
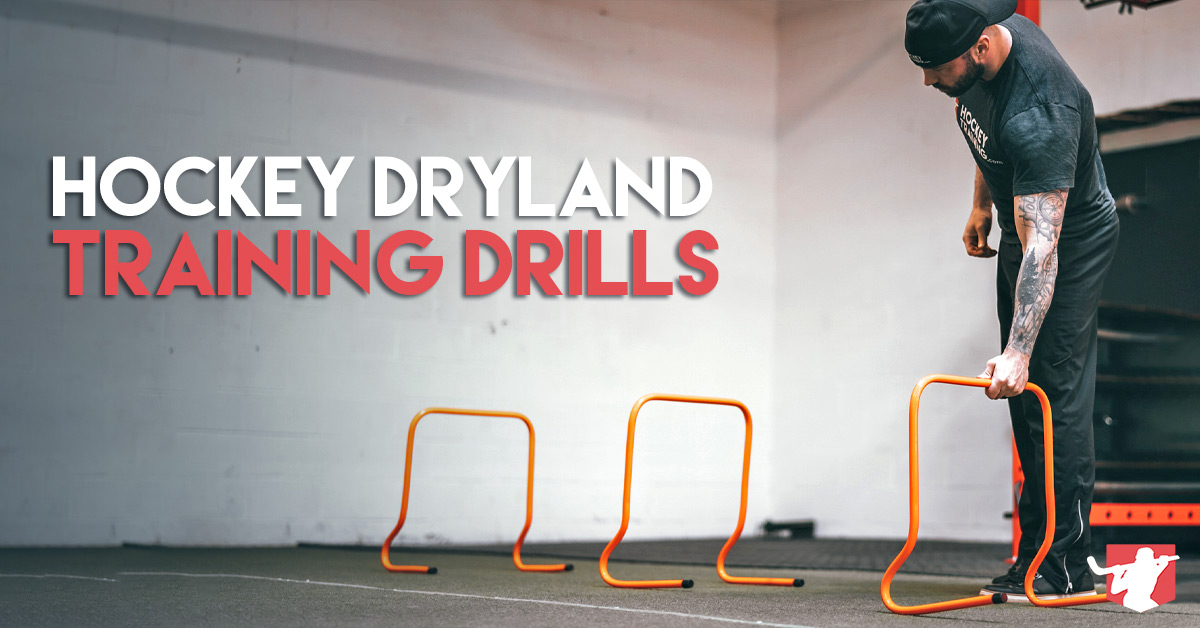
In this article, I want to show you some of the most effective dryland training drills and workouts that you can do in order to start becoming a faster, more conditioned, and agile hockey player.
Here’s what we are going to cover (click on any to jump to that section of the page):
- At-Home Hockey Dryland Exercises
- Hockey Dryland Drills You Can Do With A Partner
- Hockey Dryland Drills You Can Do By Yourself
- Example Hockey Dryland Workouts
Hockey itself is both an art and a science in terms of what it takes to prepare the athletes for a game.
Dryland training is no different.
Coaches need to select exercises that are going to have the greatest amount of transfer to a real on-ice setting, this requires a fundamental working knowledge of sports science theory and a firm grasp on what you would call “strength transfer”
That is, to what degree is the exercise you’re doing specific enough to hockey in order to have a high degree of transfer to an on-ice setting, which can vary in of itself in many ways.
Some exercises transfer to explosiveness, some will fair better towards your conditioning levels, whereas others may have a higher degree of transfer to your agility.
The list goes on and on.
Let’s go over some of my favorite exercises that you can do both when you’re training by yourself or with a partner that will have the highest degree of transfer and improve your overall hockey performance.
At-Home Dryland Hockey Training Exercises
Within this article the main focus is speed and agility dryland drills that you can do at a field, but before we get into those I wanted to include some dryland training exercises that you can do from home.
Dryland Hockey Training Drills You Can Do By Yourself
Although the above dryland training drills and workout are all valuable additions to any hockey training program design, the majority of them can only be done if you train in a team setting or have a very dedicated training partner to join you in your workout sessions.
Many of us do not workout in these conditions and need some dryland training drills that we can do by ourselves to get the same training effect.
Let’s go over some of my favorite solo hockey training exercises that you can do to improve your overall hockey performance.
Deceleration 3-6-9 Suicides
I know what you might be thinking, who would ever want to train deceleration? Shouldn’t it be acceleration?
Acceleration training is covered within your hockey training program design through various sprinting and jumping protocols, however, deceleration must also be trained and is a critical component to improving your agility out on the ice.
Agility put very simply, is your “stop-start” speed.
Meaning, agility represents your ability to be able to not lose any speed or momentum during high-velocity direction.
When your decelerative strength is at an elite level then you have the ability to absorb high-levels of force and redirect them elsewhere in an instantaneous effort in comparison to your opponents who will need to slow down in order to be able to handle the forces being placed on them.
For example, if you are skating at your top speed and you have a high-level of decelerative strength you will be able to stop on the dime or change directions instantly.
Alternatively, your opponent who hasn’t trained his decelerative strength will have to either:
1 – Perform an awkward stutter-stop as he skips along the ice
or
2 – Slow his speed down dramatically before he stops or tries to change direction
When you have higher levels of decelerative strength it puts you 3-5 strides ahead of your opponents who have never heard of this concept.
Yet, to me, it’s so obvious.
Just think about it, when you hear of “stop-start speed” stopping is literally 50% of the equation! Why people aren’t training this physical fitness characteristic is beyond me.
With that out of the way, the deceleration 3-6-9 suicides are an excellent way to train both decelerative strength and conditioning at the exact same time.
How it works is you’re going to set up one cone at the 3-Yard line, another cone at the 6-Yard line, and a third cone at the 9-Yard line.
Run to the first cone and stop with both feet, back pedal to the starting line, run to the second cone and stop with one foot, back pedal to the starting line, run to the third cone and stop in a lateral position, then finish by sprinting forwards back to the start line.
This creates bilateral, unilateral, and lateral decelerative strength that will translate to your agility out on the ice while simultaneously training the correct energy system for hockey specific conditioning.
Broad Jumps
Broad jumps are an excellent horizontal power-based exercise (think “horizontal power” like anything that causes explosive hip extension), and through a combination of published scientific literature and a working knowledge base in movement mechanics we know that these types of exercises impact both speed and agility.
Essentially, when you are in a starting position just before a jump or sprint, your body is running at a 45-degree angle. So, naturally, you are utilizing more vertical force production to fight gravity.
But, the more and more you “stand tall” as you approach your top speed, the more and more active horizontal force production becomes.
In fact, horizontal force production has been found to be at its highest during both top speed and deceleration during athletic movements.
Meaning, not only can horizontal force production improve your top speed out on the ice, but, it is also going to have a major impact on your agility through improving your decelerative strength.
Broad jumping is a very high-power output exercise, and because of this, you should never perform more than 5 reps in a single set.
I prefer more often than not to keep it much lower than that as I see fatigue settle-in normally after three jumps — this is something you don’t want.
When it comes to power, always opt for quality over quantity (we could say this for most things, but, especially for power-based exercises).
Perform 1-3 jumps per set and you will create a very high-quality training stimulus that will help you improve your deceleration, top speed, and overall plyometric strength.
Lateral Bounds
Lateral bounds are similar to skater bounds but instead of continuously going back and forth you are instead moving in one direction until you have completed the prescribed reps for that leg.
For example, if you were prescribed 3 reps per leg of skater bounds, you would simply jump back and forth in an alternating fashion until you were finished the set.
Whereas with lateral bounds you would do all three reps with your right leg first and then proceed to do all of the reps with your left leg after.
Although these exercises look very similar to most people, they are slightly different which is why I like them both for different reasons.
The skater bounds allow you to get a better plyometric effect since you are getting a stronger stretch-reflex contraction every time you land.
Whereas I find with the lateral bounds that the athlete is better able to work on their triple extension (due to more “hang time” in the air) at the hip, knee, and ankle to improve their stride length.
They’re both great exercises and should both be incorporated into your programming throughout the in-season/off-season instead of just the skater bounds which I see most people use more often than not (probably just because it says skater in the exercise name).
Similar to the broad jump, this is a power-based exercise so keeping the rep counts very low is ideal in almost all scenarios.
The broad jumps help with that top speed and deceleration whereas the lateral bounds are helping you with your stride length and lateral explosiveness — excellent combination to make for an extremely effective dryland hockey training workout.
Sprint Variations
I utilize a very wide variety of different sprint variations in my programming because if there is one thing I have found out for sure in my hockey training career it’s that when you get a hockey player to run faster on the ground they will be faster on the ice.
The carryover happens every single time.
But, in order to continue to provide a novel stimulus for their muscles to adapt to I change which variations I choose each phase. Beyond this, I think it’s critical to begin with more basic sprint variations early in the off-season (e.g. three-point stance sprints or falling start sprints) before you move into more advanced versions that create harder forces on the body (e.g. kick up start sprints or knee jump into sprint).
Sprints are excellent for a variety of reasons worthy of making it the subject of an article post all on it’s own as it positively impacts speed, conditioning, agility, fat loss, and structural balance all-in-one.
In most cases for speed and agility you would keep all of your sprint sets at or below 20-Yards in length, and for your conditioning you would increase this length up to a max 40-Yards in one set.
Lateral Shuffle
What you’re going to do here is set up two cones that are 15 yards apart and lateral shuffle your way there and back non-stop.
This would account for one rep and you would ideally repeat this four times with 60 seconds rest in between.
The reason I like to use this movement pattern across these specific distances is that it creates an excellent marriage between training both your lateral explosiveness and your lateral endurance at the same time which will have a very natural carryover to your on-ice skating stride.
Beyond this, the low center of gravity and overall lateral nature of the movement demand replicates the joint angles of skating in a very efficient way to increase the overall specificity of the exercise.
Of important note, I do not want you to cross your feet at all during this shuffle. It is a shuffle exercise, not a crossover step or carioca exercise.
Dryland Hockey Training Drills You Can Do With A Partner
Get Up Tag
In this exercise, you’re going to need to create a square with four cones.
The size of the square you make is going to determine the degree of difficulty required in order to stay away from whoever is “it”.
Your square can be 5 yards distance, 10 yards distance, or even 15 yards difference, it doesn’t really matter.
In most cases, I recommend starting with a 10-yard distance between each cone and working from there based on the ability of the athletes.
How it works is you’re both going to lie down with the top of your heads facing each other, one athlete is determined to be “it”, and once the whistle blows (or you count yourselves down) the one who is “it” needs to two-hand touch the athlete who is trying to get away.
This is an excellent dryland drill for hockey specific agility because it will force you to remain explosive in both a forward and lateral plane of motion, and you will also find yourself backpedaling quite a bit as well to “round off” the overall athleticism required to perform this exercise.
Beyond this, the reason I like it so much for agility is that it is reactive in nature. Meaning, you’re not just running around cones in a predetermined movement pattern.
Instead, you’re truly reacting to your opponent just like you would have to in a chaotic on-ice environment.
Things don’t happen in predetermined ways out on the ice, so they shouldn’t happen in predetermined ways during your training.
When you understand this and start incorporating it into your training you then start effectively training both the body and mind for optimal performance.
Lastly, this exercise will also become very fatiguing as the sets go on, so it naturally trains your agility-specific conditioning as well.
One game of tag where you are both “it” equals one rep, repeat for five reps total with zero rest at all in between games.
Mirror Sprints
You may already be familiar with an exercise we have done many times here on HockeyTraining.com called the mirror lateral shuffle drill.
This dryland drill is a similar concept, but with this exercise I want you to sprint forward.
How it works is you’re going to have one leader and one follower who is immediately behind that leader.
You’re going to have a predetermined distance between each other of 5-20 yards and the follower has to replicate everything that the leader is doing.
The leader can sprint forward, stop, or backpedal at any moment during this drill. The follower must do exactly what the leader does and react as fast as possible to the change in movement.
I really like this exercise because the follower is training their reactive agility, but the leader is training their agility on a completely different level where they are trying to fool their opponent (which is something you always use out on the ice when trying to blow by your opponents).
For this exercise I want you to cover 15 yards of distance and once you both have been the leader that counts as one rep. Repeat for five total reps with no rest in between.
3-Point Agility Cone Drill
The final exercise we are going to go through today is the 3-Point agility cone drill.
How this exercise works is you are going to have three cones separated 5-10 yards apart from each other in a straight line.
The leader is going to call out the cone that the follower has to immediately react and sprint to (and touch with his/her hand), but, return to his/her starting line 5 yards behind the cone.
This is a great exercise that trains your auditory agility (a different compartment of the brain that improves agility), explosive speed, speed of decision making, and conditioning.
Do this drill for 20 seconds non-stop, rest 60 seconds, and repeat for five total rounds.
Resisted Lateral Shuffles
In the above example, I am resisting Kevin’s movement with a band, however, if you’re by yourself you will receive an identical training effect by doing lateral shuffles with a weighted sled, prowler, or simply doing it bodyweight-only going up a hill (the hill creates the additional force-effect on your lateral musculature).
Lateral shuffle variations are always something you want to keep within your programming as the low center of gravity and joint angles/velocities of this movement has a high degree of strength transfer to your stride length.
When using resistance, I don’t like to cover distances greater than 10-Yards as fatigue can cause a technical breakdown in exercise execution and when you’re in motion with added resistance you are opening yourself up for a possible unnecessary injury risk.
When resisted, cover short distances with your max-effort for the best effects. Typically, perform this exercise in a “10 yards there, 10 yards back” fashion where you shuffle laterally on your left first on the way there, and then switch the resistance to shuffle laterally on your right on the way back.
If using a hill for resistance, lateral shuffle upwards for ten yards, slowly jog back down, and then shuffle back up again on the other side to keep it balanced.
Example Hockey Dryland Workouts
Hockey Dryland Workout You Can Do By Yourself
A: 3/6/9 Deceleration Suicides – 5×1 [90 secs rest]
B1: Partner Band Resisted Lateral Shuffle (10 yds there and back = 1 rep) – 5×1 [0 secs rest] **I have listed a variety of substitutes for partner band resisted lateral shuffle drills in the above section on this exercise.
B2: Triple Broad Jump – 5×1 [90 secs rest]
C1: Lateral Bounds(3 in each direction = 1 rep) – 5×1 [0 secs rest]
C2: Sprint 20 Yards – 5×1 [90 secs rest]
Note: B and C exercises are supersets. You would perform these exercises back to back, rest, and then repeat.
Hockey Dryland Training Workout With A Partner
A: 30-Yard Shuffle (15 yards each direction = 1 rep) – 4×1 [60 secs rest]
B: Get Up Tag (when both finish a turn = 1 round) – 5 rounds [no rest between rounds]
C: Mirror Sprints x 15 yds (when both have gone = 1 round) – 5 rounds [no rest between rounds]
D: 3-Point Agility Cone Drill x 20 secs (when both have gone = 1 round) – 5 rounds [60 secs rest]
Hockey Dryland Workout When You Have Limited Space To Work With
A – Triple Split Squat Jump Into Isometric Hold – 8 x 2 reps [30 secs rest]
B – Vertical Jumps – 8 x 3 jumps [30 secs rest]
C – Lateral Hops – 8 x 3/side [30 secs rest]
D – Plank With Elbow To Knee Touches 3 x 30 secs [60 secs rest]
The Solution
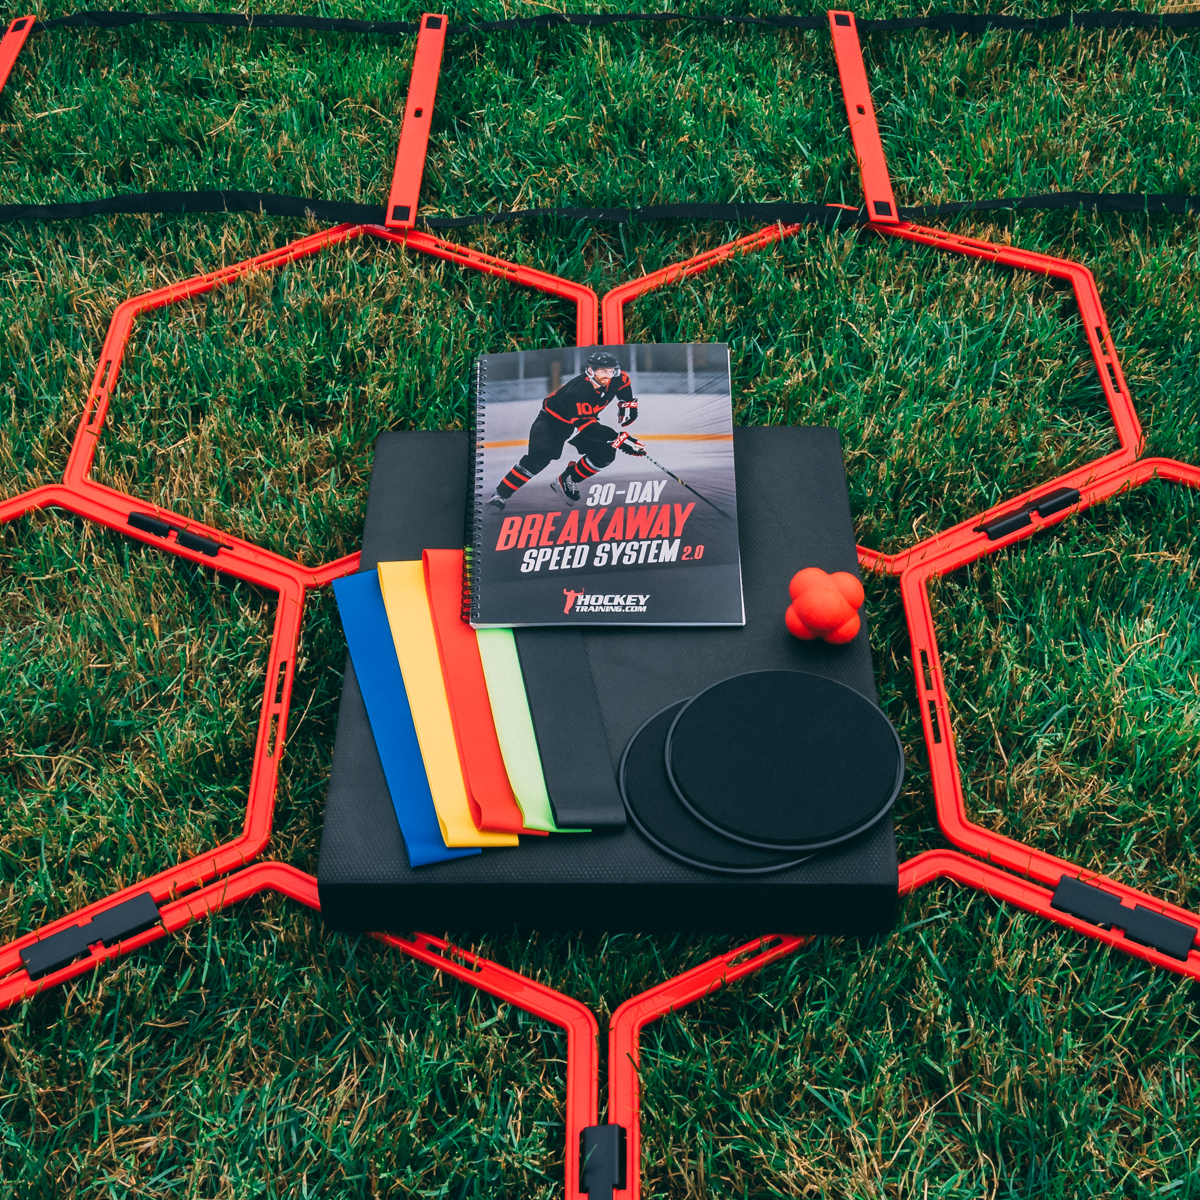
Pictured above is our brand new Breakaway Speed Kit that we just launched to help hockey players of all ages who want to improve their explosive skating speed!
The kit includes the six hockey speed tools that I consider “must haves” if you are serious about doing the best possible dryland work to improve your hockey performance.
Additionally, it comes with our brand new 30-Day Breakaway Speed System so you can put to use all the knowledge you learned above into a “done for you” advanced dryland hockey training program…
The all-new 30-Day Breakaway Speed System was designed to take all of the guesswork out of it for you so you can train with the most cutting-edge methods to get serious results.
This is an intense 30-day progressive SAQ training approach that includes weekly speed, agility, and conditioning workouts to become an elite skater…
You will get access to the comprehensive 30-day schedule that shows you exactly what to do on each day…
Your days of guessing and hoping you will be a better hockey player are over…
Get started with the 30-Day Breakaway Speed System today so you can leave fans, coaches, and scouts jaws on the floor with how much progress you have made in a single month of training. Click here to get the Breakaway Speed Kit today!
Frequently Asked Hockey Dryland Questions
Dryland refers to the training that you are doing not on skates (also referred to as off-ice training). This can include weight lifting, speed, conditioning, agility, and more mobility drills.
During the hockey season, players should be doing 3-5 dryland training sessions per week (although the intensity is lowered around games). In the off-season, hockey player should be doing dryland training up to 6 days per week.